Note: All photos are clickable.
Among the many articles in the last issue of Fibre & Stitch was one concerning how craftswomen in Africa turn found objects into art and Sue Bleiweiss used this idea to challenge us to see what we can do with things we find around our homes. The cut off date for this challenge is July 5, so procrastinator that I am I started looking around my home yesterday. We recycle and/or reuse/re-purpose everything we can think of. A perusal of the recycling area lead me to our stash of plastic sacks/bags. Most of those show a distinct lack of personality but the few colorful ones fairly jumped out of the bin and into my arms, notably yellow, blue, red, green and white. I’ve got a dim memory of my mom and her friends crocheting bread sacks into shopping bags. So I sliced the yellow bag into 1 inch strips, looped them together and rolled it into a ball, then attempted to crochet it. I felt like Goldilocks, all my hooks were too little or too big, none were just right, so back to the drawing board, because I really want to do something with these sacks, the colors are very pretty. So I cut them apart into single layers and voila!

Red layered on blue equals purple. Add the white sack underneath all of it and the color intensified. So I did what any stitch crazy person would do, I stitched those layers together, no stabilizer, but I quickly switched to a teflon foot. Here is the result using variegated machine embroidery thread. and lots of built-in stitches (I’m going through a phase of using those built-in stitches. I figure I paid for those I might as well use them — but honestly I think it’d been faster to just free motion stitch.)

If you try this remember to only use fairly open type stitches like a feather stitch, not a satin type stitch as that tore the plastic. The other thing I learned: I should have fused the Pellon prior to the stitching, it would have made the later stages of this project easier. You live and learn. I was so excited with the result that I immediately cut this into 1 inch squares because now I knew I’d use these for an Inchie swap over at MQ Resource. ( A great place for machine quilters to hang out).

Fusing: I cut a 12 inch square of fusible Pellon and 12 inch square of a yard sale fabric buy. Lay the fabric face down on the ironing surface, put the Pellon on top of that, lay out the inchies on the Pellon, cover with a teflon pressing sheet or baking parchment and then press with your iron set to Nylon. I held it in place over each section about 30 seconds, just long enough to tack them down. Then I turned the whole thing over, (parchment side is now on the bottom-fabric on top) and I pressed an additional 45 seconds. (times might vary depending on your iron and your pressure and the phases of the moon) The heat of the iron deepened these colors and removed some shine. (It reminds me of leather and now I want to try this with some of the brownish colored sacks)
Next step: zig zag around all those inchies.
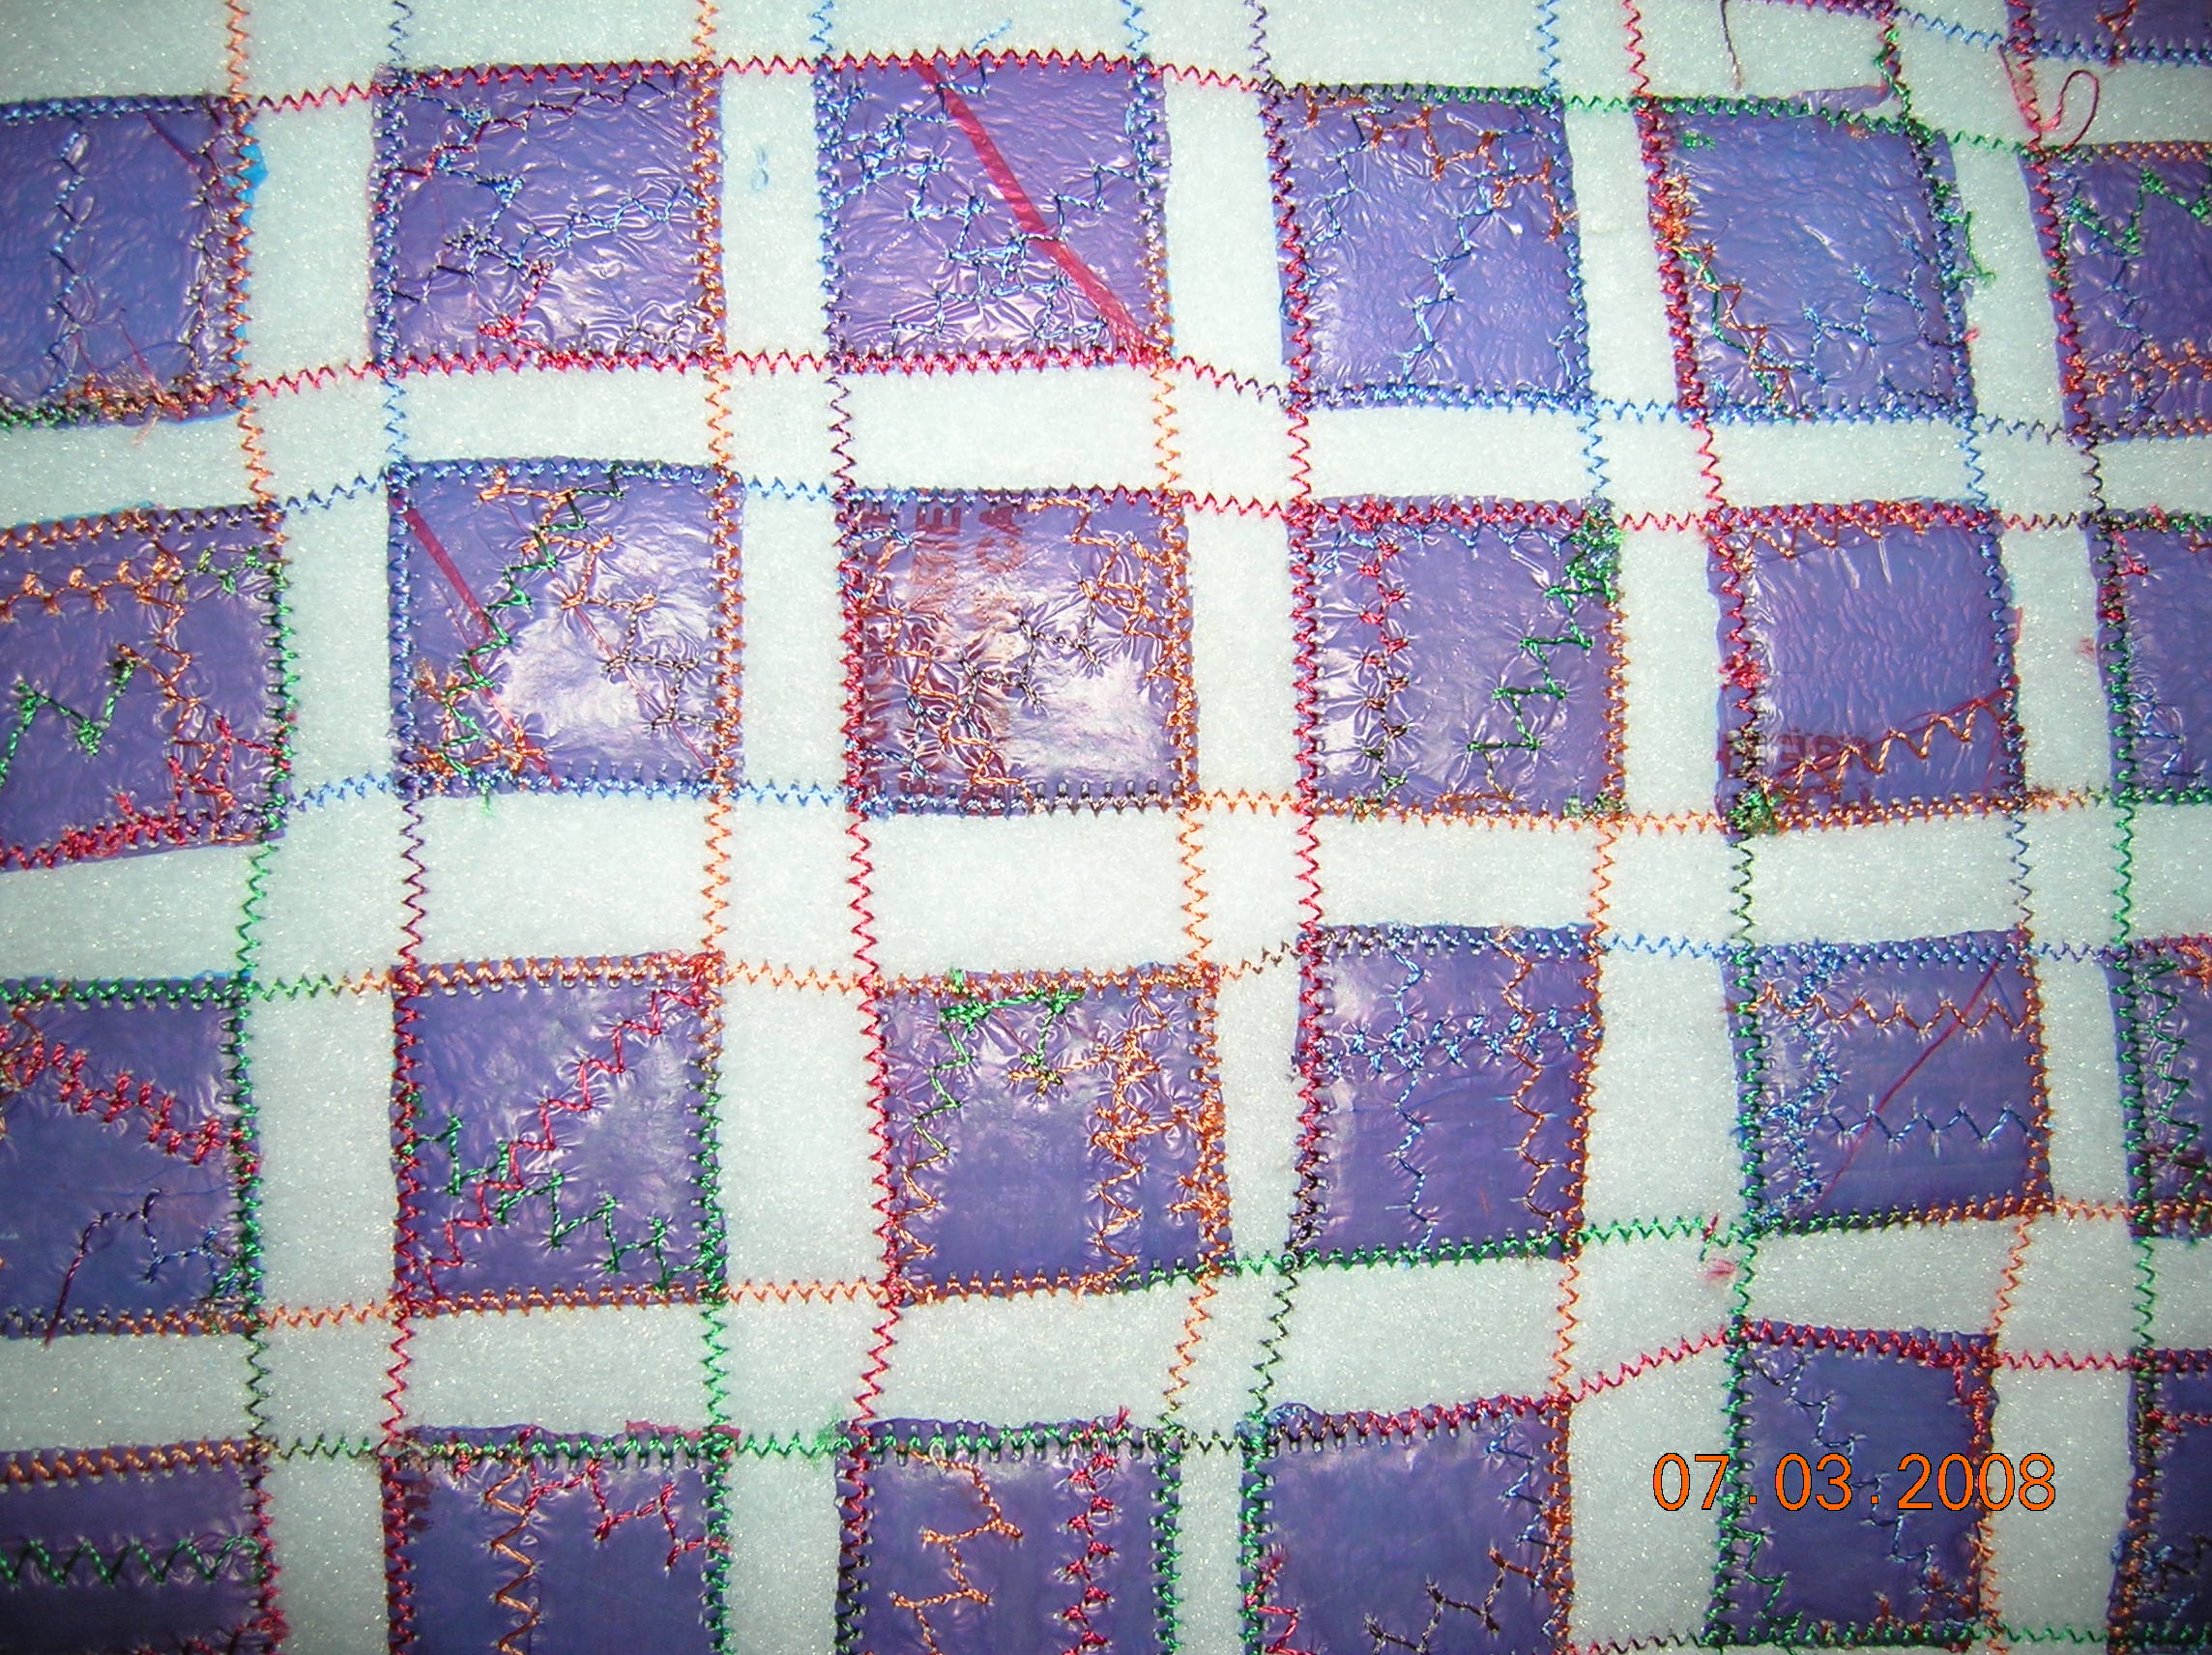
Next: Cut them apart. This was quicker and easier than you might think thanks to my sharp little snippers.

I like how these look, but what about some recycled bling? I love the thermoseals from coffee grounds and cashew cans so I’ve got some on hand. I cut another red sack, shown here with my June Tailor Shape Plus Cut tool. (one of my favorite tools)

Here are the inchies with the cut up red sacks and the thermoseal bling.
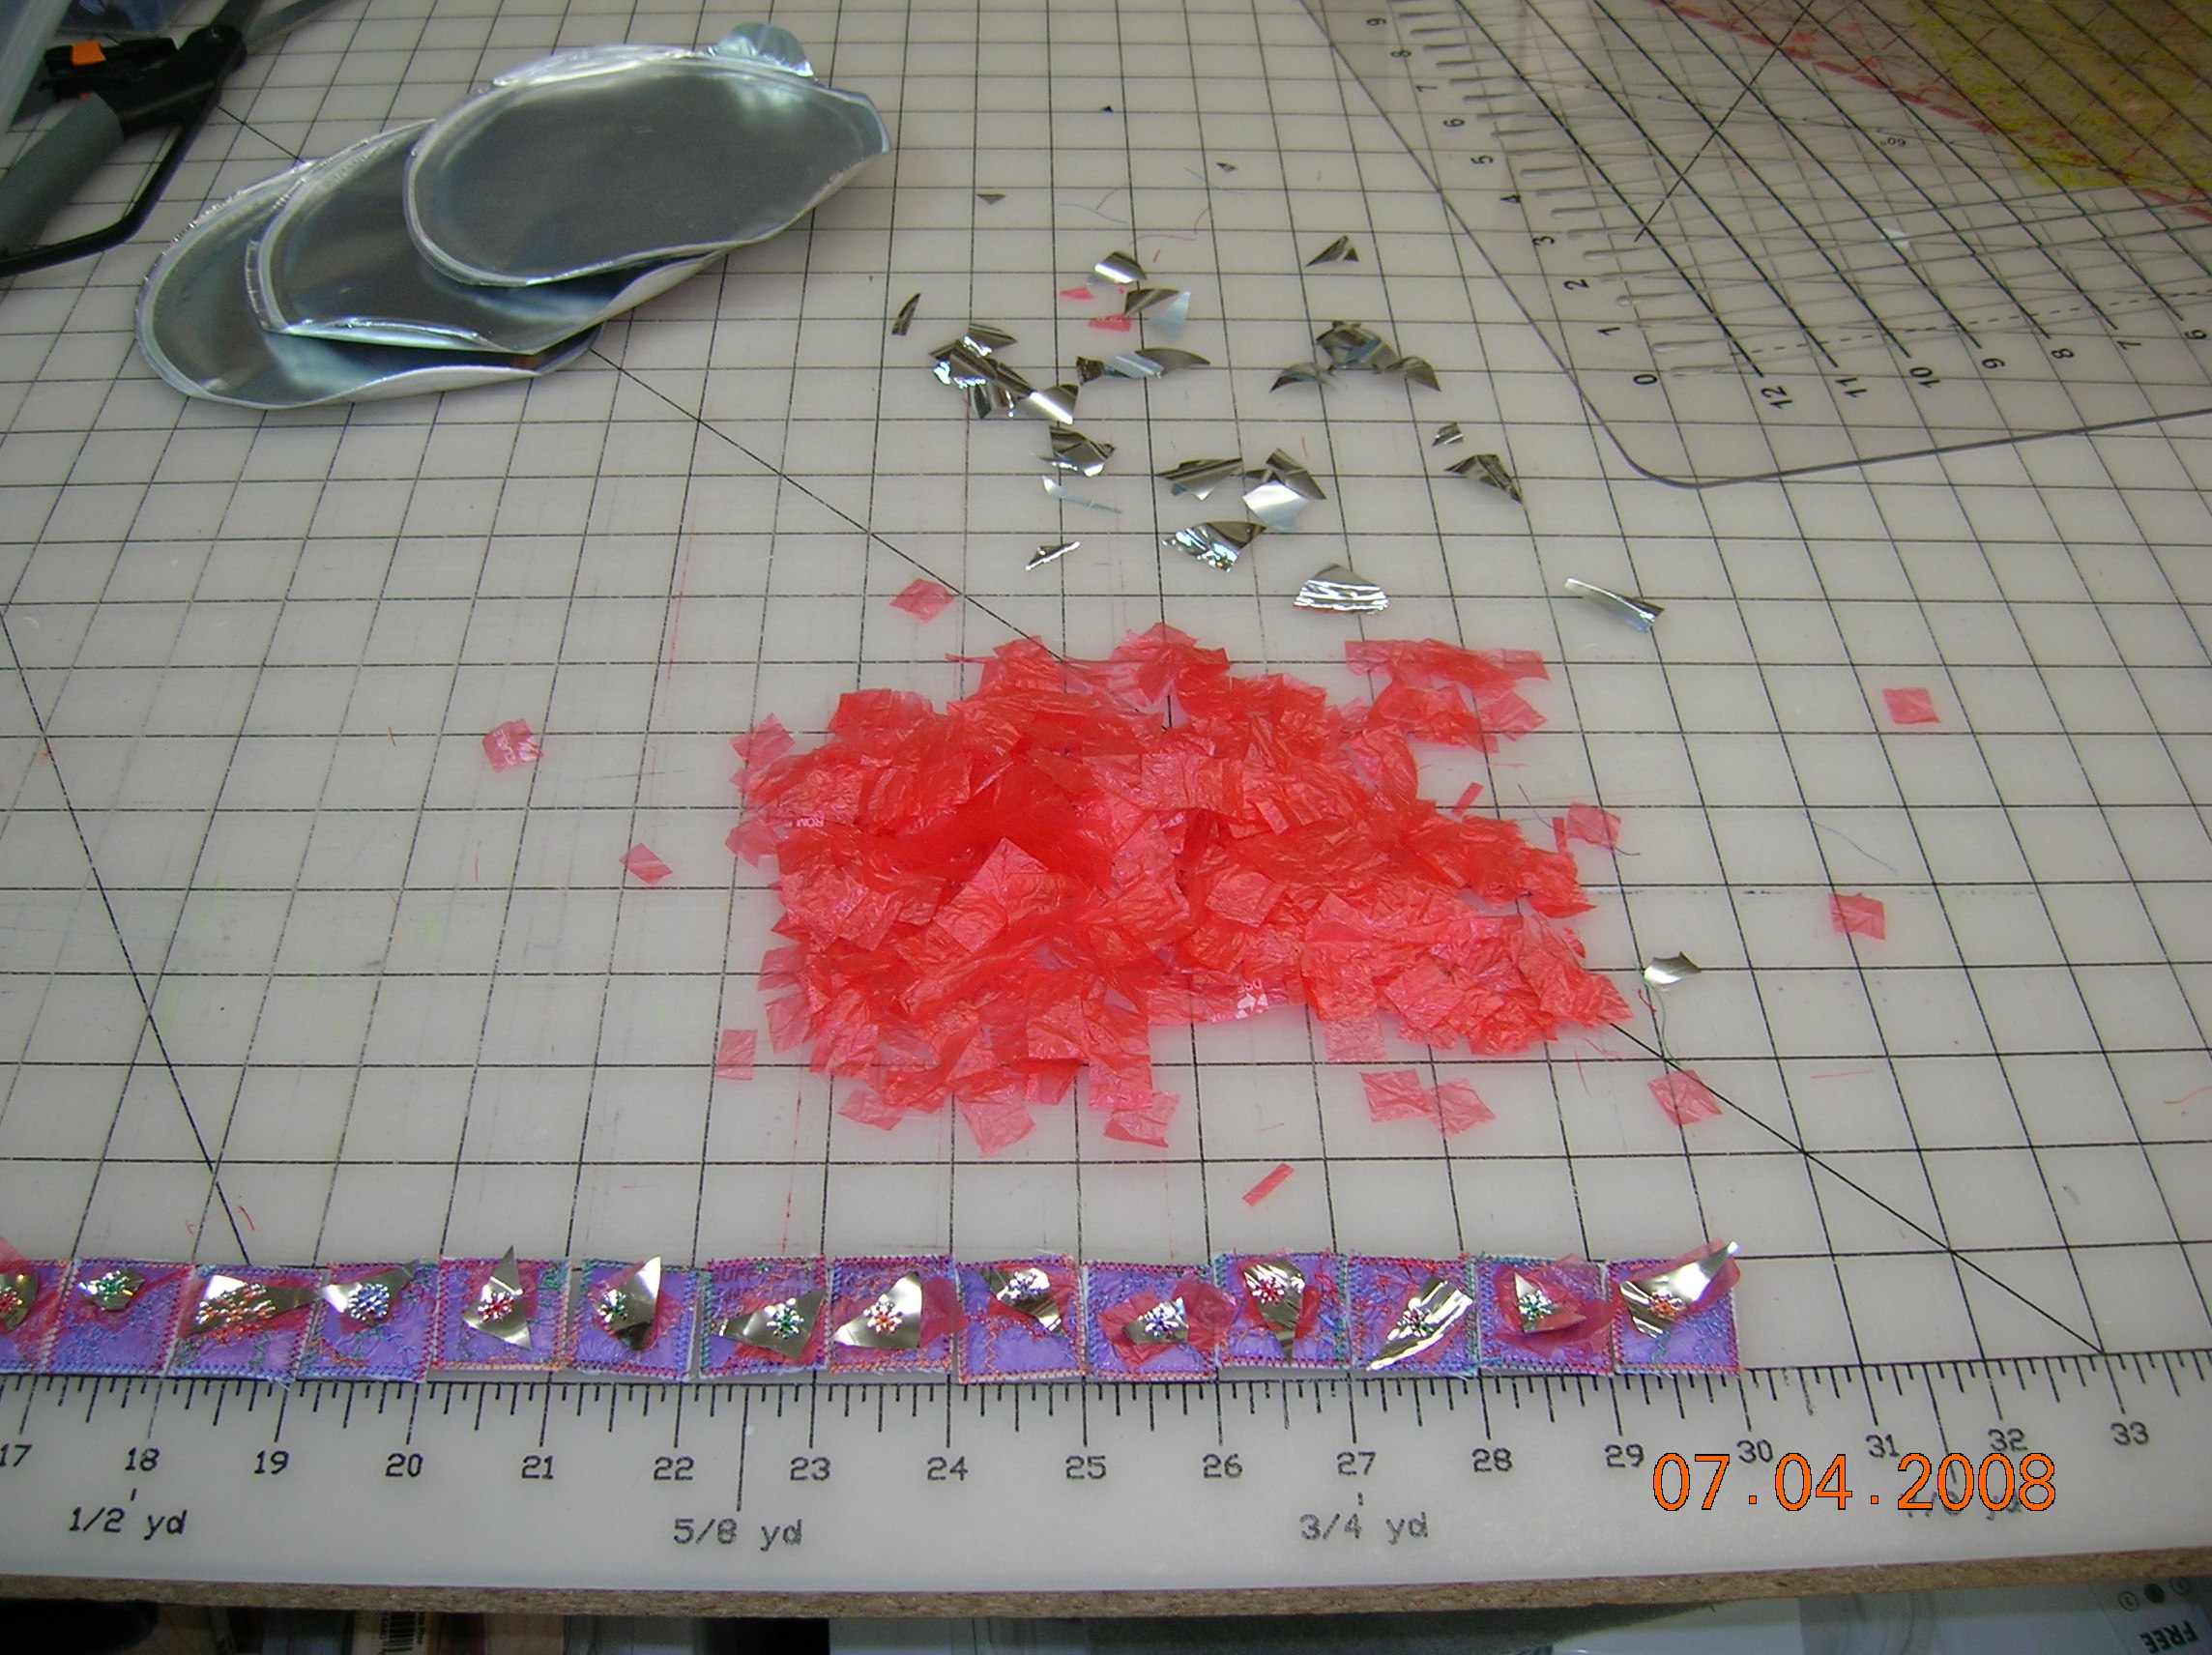
I placed a couple of little squares of red sack on the inchie and topped that with a triangle of thermoseal bling and then fancy stitched it down with my sewing machine.
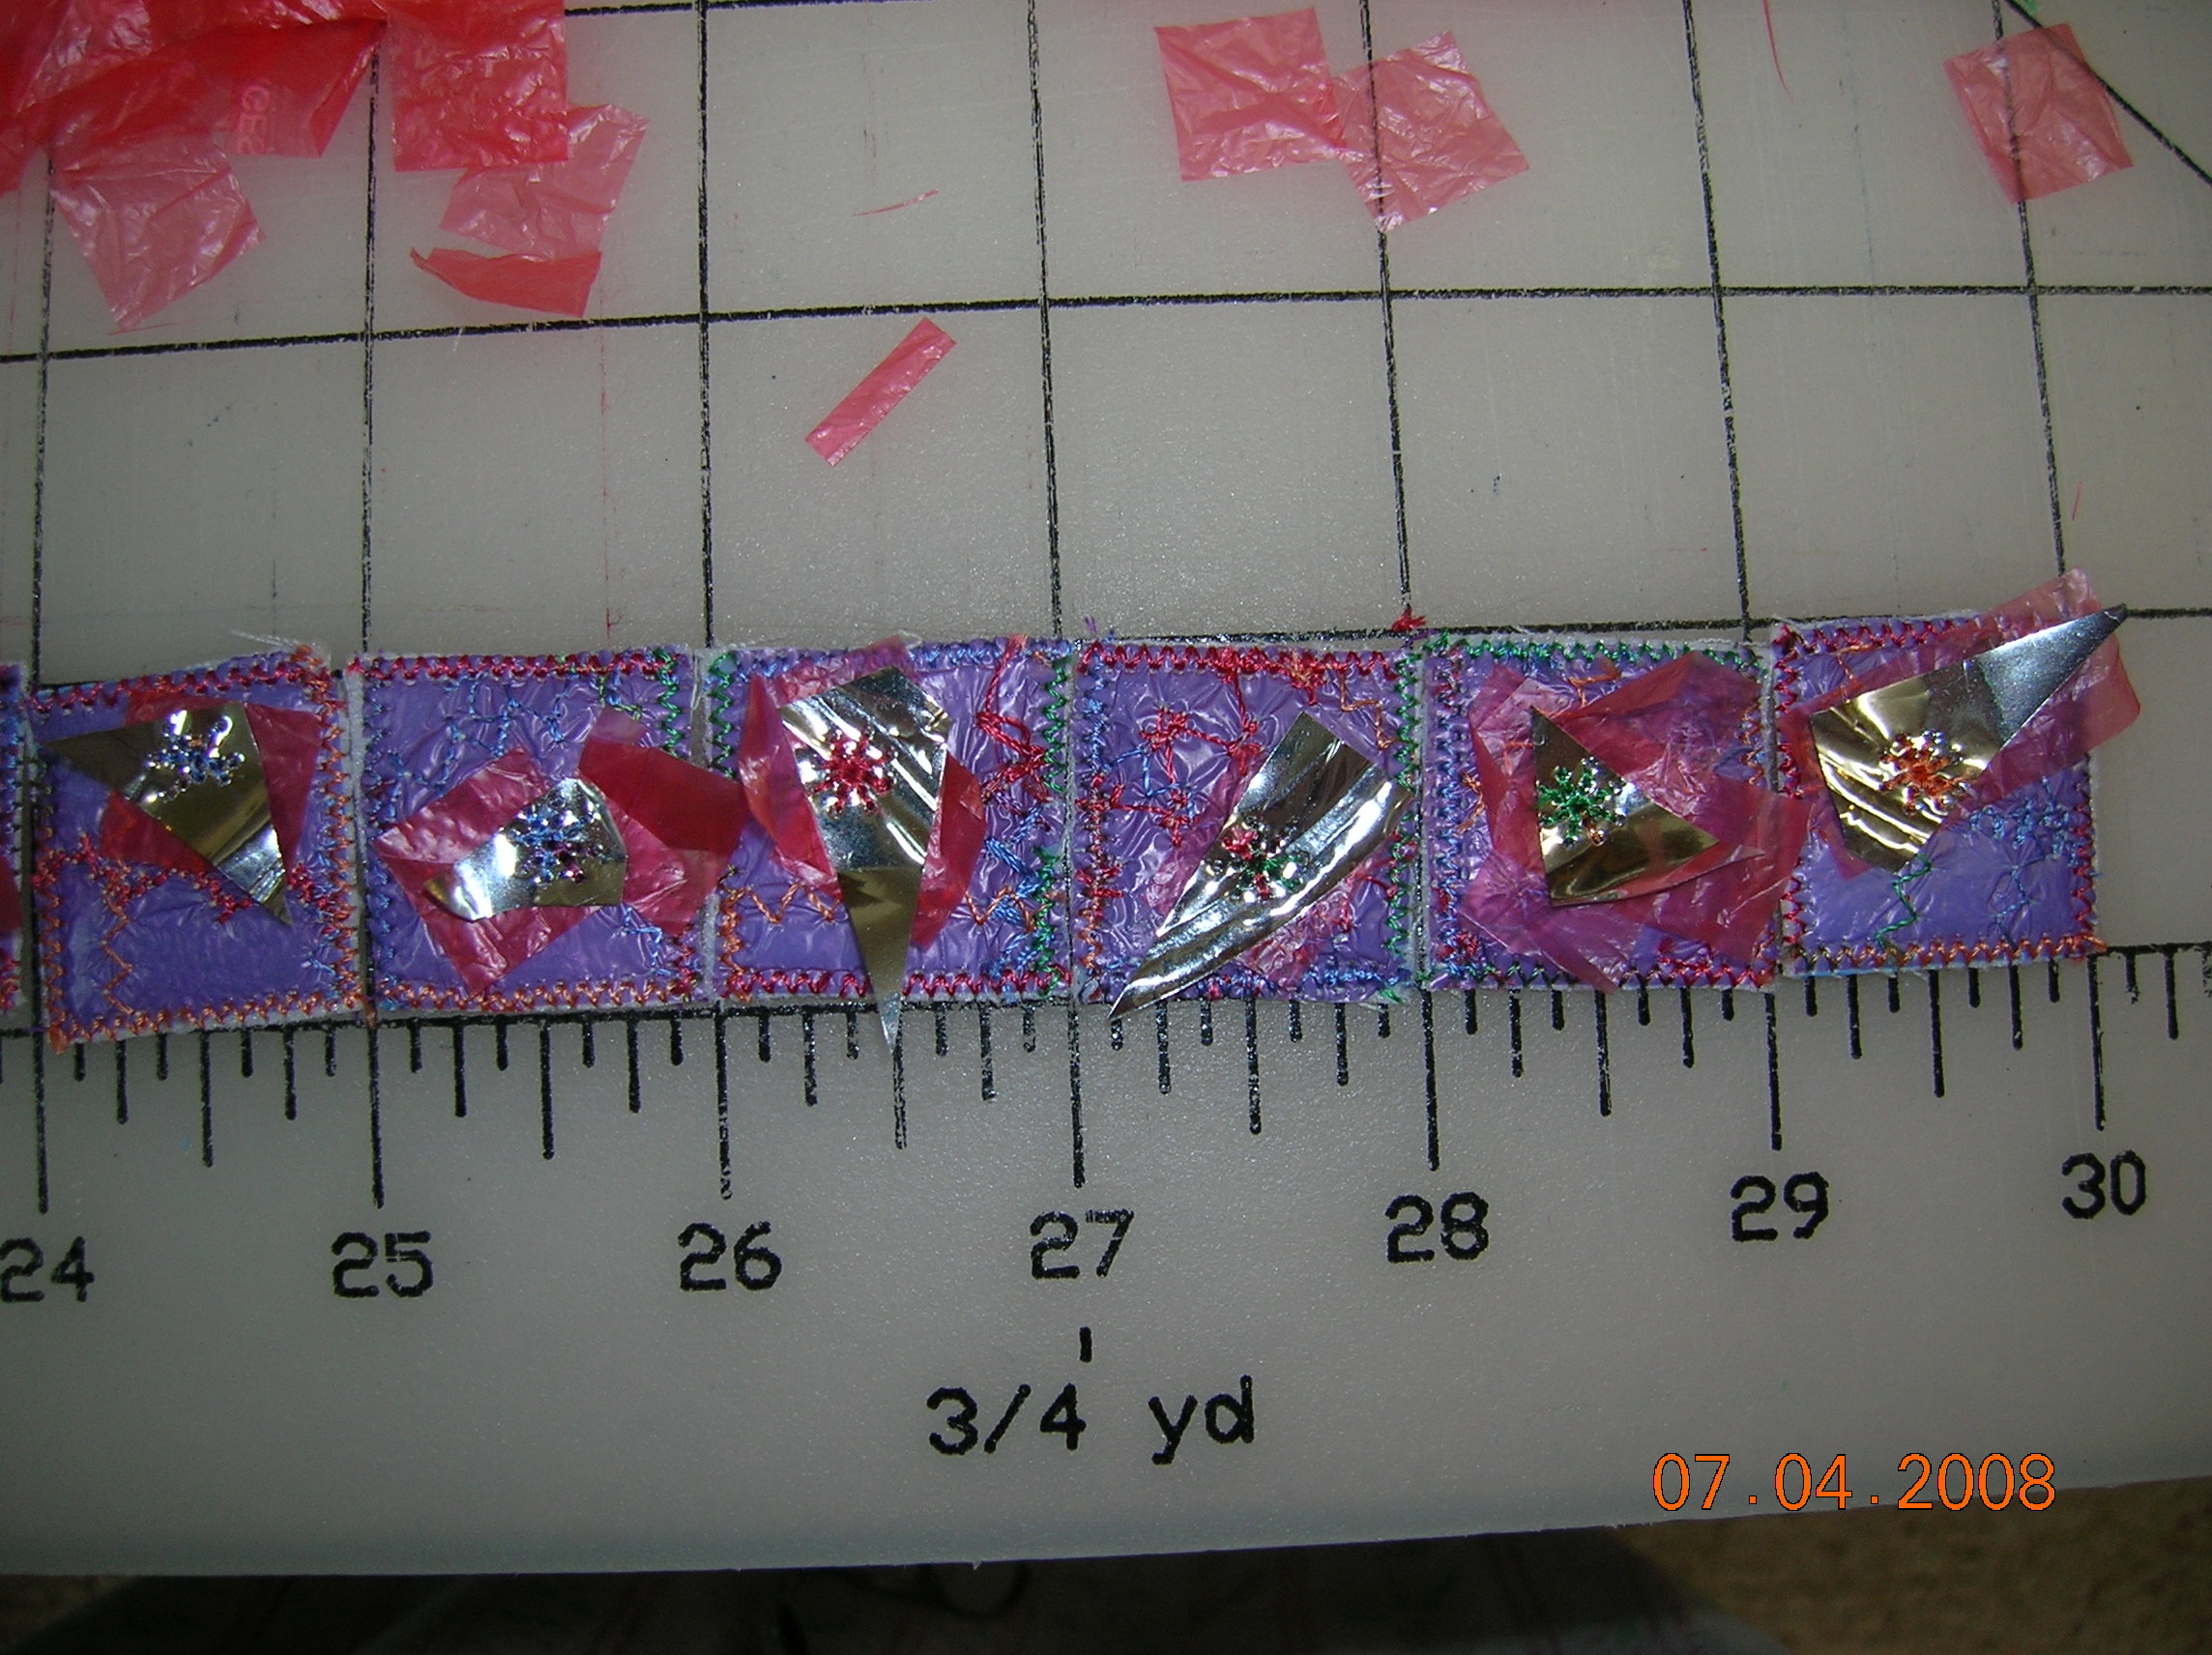
Thirty of these are for the MQ Resource swap. I’ve got 50 extra to swap if any of you want to swap with me. Let me know if you want yours with bling or without.
Tags: Fibre & Stitch, fusible, fusing, inchies, MQ Resource, plastic bags, plastic sacks, recycle, trash into art

July 4, 2008 at 2:38 pm |
Brilliant!!
July 5, 2008 at 6:42 am |
Judi, your inchies are so cool! It’s going to be so much fun to see what everyone comes up with for the swap!
July 5, 2008 at 7:35 am |
Thanks fo much for posting this. Just yesterday I was looking at a plastic bag and thought “there must be SOMETHING I can do with this”. What perfect timing!
July 5, 2008 at 9:44 am |
Judi!
These inchies are wonderful!! I think that a good grouping of them mounted in a grid and framed would be stunning!!
thanksfor the tutorial!!
I will be back again- I love your blog!!
Elizabeth
July 5, 2008 at 3:03 pm |
This is the second project in the last couple of months I have seen using plastic bags… I must try this 🙂 I like your how-to show and tell, Judi! The finished project is great!
July 6, 2008 at 2:26 pm |
Judi it looks great! What a fun and funky way to use up the plastic bags.
I saw in one of the embellishing magazines that one of the fabric artists was using the “thread tangles”. You know those pieces of thread that get all tangled together when you launder your fabric. She was using the tangles in some of her projects.
I am slowly getting hooked on this embellishing stuff! Speaking of such… I should take some pictures of my first beading embellishment project. I’m sure you’ll be “hooked” too!
-Alice
July 12, 2008 at 11:56 am |
Your inchies are gorgeous!
July 16, 2008 at 7:30 am |
judi,
WOW!!!
:applauds
those are just amazing!
could you put them onto something fabric i wonder,that had to be laundered? I’m making a very foofy apron for my daughter… i think a few of those would be darling on it. but what would happen to them if you washed them? i can’t wait to see what you do with them. what are your ideas so far?
July 16, 2008 at 1:30 pm |
Fantastic and creative. I think I will be digging through my plastic bags at home to give this a try.
July 18, 2008 at 12:12 pm |
Man, youre a good teacher. thanks!
Gayle
August 2, 2008 at 7:33 am |
very cool….
i will have to try this…I have a quilt that got “ruined” experimenting with quilting techniques….maybe I should cut off some inchies from that and trade you for these (inchies from my quilt would look great…the quilt overall is the problem)